How to Transfer Disney PhotoPass Images to Google Photos or Google Drive
Hi Friend!
If you’ve ever visited Walt Disney World and used Disney PhotoPass, you know how magical it is to have professional-quality photos capturing your unforgettable memories. However, downloading and organizing these photos can be time-consuming. If you’re wondering how to transfer PhotoPass photos to Google Photos or how to download all Disney photos to Google Drive, you’re in the right place! This guide will walk you through the different ways to save your Disney PhotoPass images efficiently.

THE LONG WAY: Manually Downloading Disney PhotoPass Photos
If you prefer to transfer your Disney PhotoPass images manually, follow these steps:
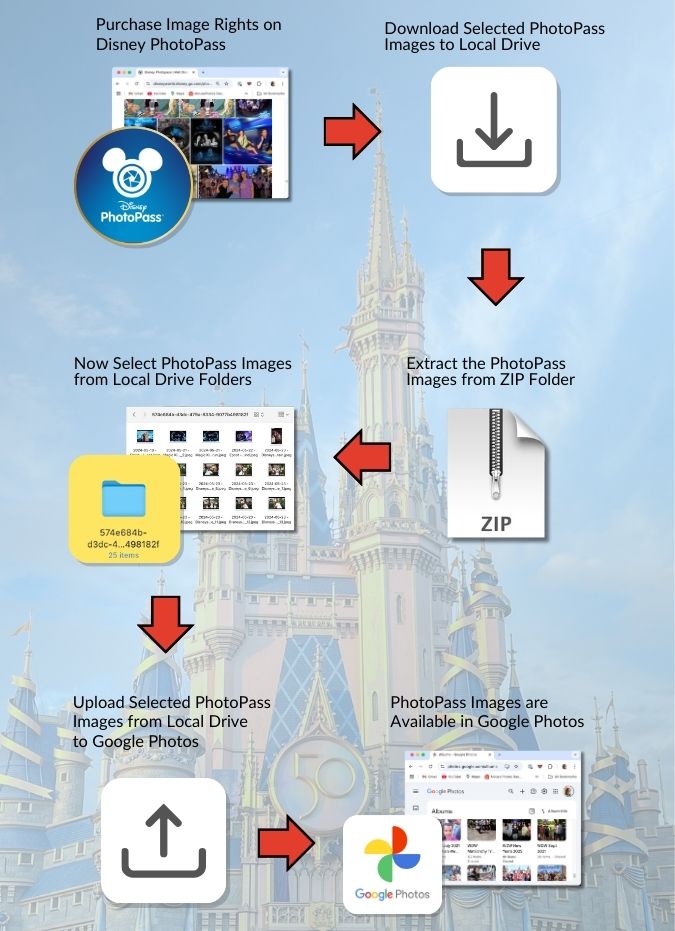
Step 1: Access Your Disney PhotoPass Photos
- Select the images you want to save.
- Log in to your My Disney Experience account.
- Navigate to the PhotoPass section.
Step 2: Download Photos to Your Computer
- Click on the Download button.
- If you have many photos, you may need to download them in batches.
- The photos will be saved as a .zip file on your computer.
Step 3: Transfer Photos to Google Photos or Google Drive
- For Google Photos:
- Open Google Drive.
- Click New > File Upload and select your downloaded photos.
- For Google Drive:
- Open Google Drive.
- Click New > File Upload and select your downloaded photos.
Click Upload and select your downloaded images.
IMPORTANT Note: To download your Disney PhotoPass images without a watermark, you must purchase a limited copyright license, such as Memory Maker or the Disney PhotoPass Downloads add-on for Annual Passholders. For more information about these packages go to our previous post “Disney PhotoPass and Memory Maker Explained”.
While this manual method works, it is quite time-consuming and requires multiple steps. If you’re looking for a faster and more efficient way to transfer all your Disney PhotoPass photos to Google Photos, keep reading!
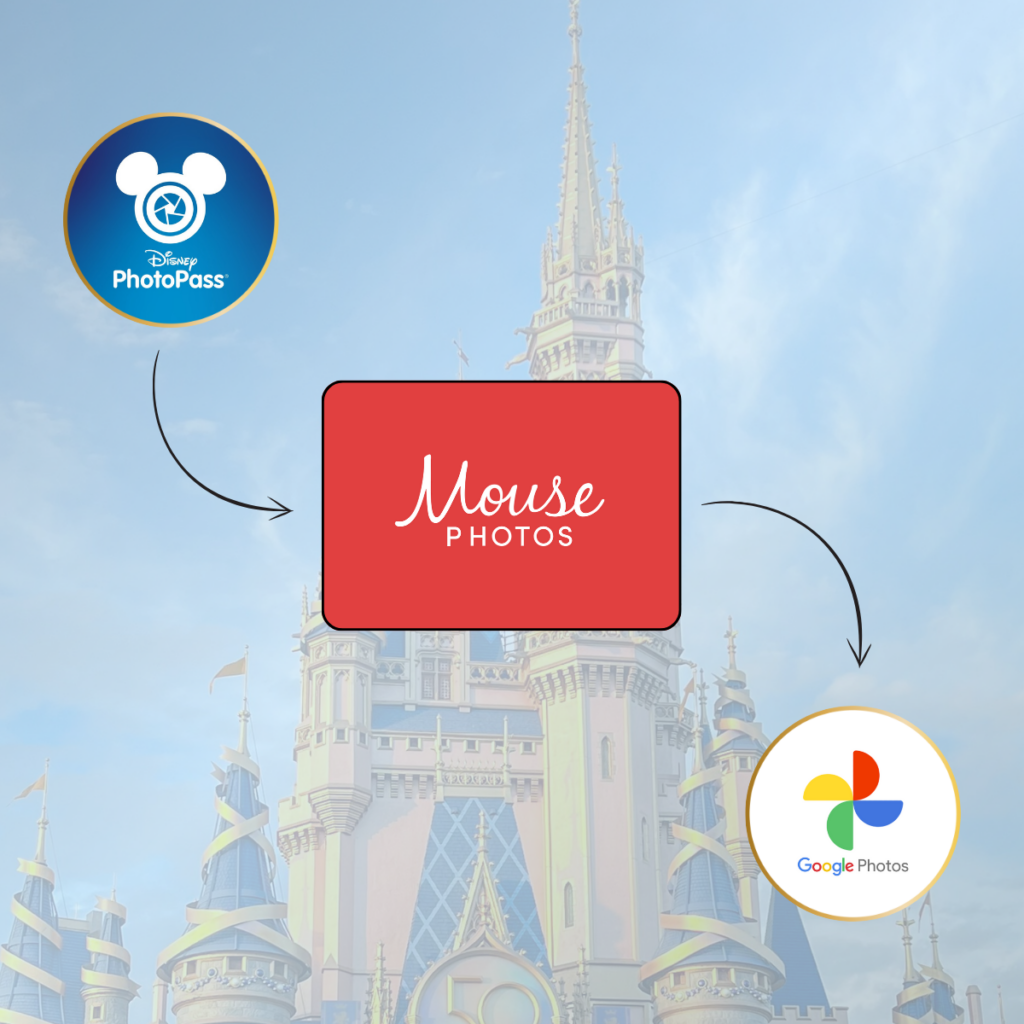
THE EASY WAY: How MousePhotos Makes This Process Effortless
Instead of spending time manually selecting and uploading your photos, MousePhotos automates the entire process for you. Here’s how:
Why Use MousePhotos?
- Automatic Transfers – No need to download and re-upload manually.
- Saves Time – Your photos are moved to Google Photos in just a few minutes.
- No Technical Hassles – No need to unzip files or sort through multiple downloads.
How to Use MousePhotos to Transfer Your Disney PhotoPass Images
- Visit MousePhotos.com and sign up.
- Link your My Disney Experience account to MousePhotos.
- Authorize Google Photos access so MousePhotos can copy your images.
- Choose the price plan that best fits your trip—whether it’s a one-time download, seasonal access, or unlimited transfers for frequent visitors.
- Let MousePhotos do the magic—all your Disney PhotoPass photos will automatically transfer to your Google Photos albums!
By using MousePhotos, you’ll never have to wonder how to transfer all my Disney PhotoPass photos to Google Photos again. This tool makes it seamless, fast, and frustration-free!
Final Thoughts
Saving your Disney memories should be easy, and with the right tools, it is! Whether you prefer to manually download Disney PhotoPass photos to Google Photos or use MousePhotos to copy all Disney photos to Google Photos effortlessly, you now have the knowledge to keep your magical moments safe. For the ultimate hassle-free experience, try MousePhotos today and let the magic happen! ✨
Disney Memory Maker Disney Photo Download Disney PhotoPass Disney PhotoPass to Google Photos Google Photos Memory Maker